“To err is human” – but a comprehensive test automation strategy can mitigate and reduce that risk. Unit testing is vital to any testing strategy within the software development process. Appropriate and thorough testing validates the essential logic and function of new code and ensures that new features, modifications, and bug fixes don’t inadvertently break existing functionality.
As JavaScript and JavaScript test automation frameworks like Angular and React have matured, we have seen the evolution of excellent testing tools and libraries to support the same. The Jest testing framework is one of the most popular among software engineers.
In this tutorial, you'll learn the steps required to set up the Jest framework on a new project and create a collection of unit tests. You'll also learn how to execute and debug these tests to ensure your project meets the requirements.
What is Jest?
Jest is a JavaScript testing framework built on top of Jasmine. It was developed by Christoph Nakazawa and is maintained by Meta (formerly Facebook). It supports projects using React, Babel, Vue, TypeScript, Node, Angular, and others. Jest is one of the most popular JavaScript testing frameworks because of its simplicity and ease of use. Jest includes a built-in mocking library, an assertion library, and the tools necessary to execute and debug unit tests.
Jest Example Project
Rather than walking through another tutorial about adding Jest tests to a React project, we introduce a plot twist and show you how simple it is to use this framework with an Angular project. Support for Jest is a new experimental feature available with Angular version 16. If you’re new to Angular, it is a JavaScript framework developed by the engineers at Google. You can learn more about Angular and its features and tools at angular.io.
These steps can be applied to any project, although you may need to adapt the specifics of the tests to meet the needs and requirements of your project. This example project uses the “Getting Started with Angular” tutorial on the Angular website.
The project is a simple e-commerce site with a product catalog, cart, and various utilities to introduce a new Angular user to components, services, user forms, and data management. If you followed their tutorial, you might already have some of the native Angular test frameworks included in your project (specifically Karma and Jasmine).
Complete this section only if your project already has unit tests using the Angular framework.
Remove the dependencies for Karma and Jasmine: execute the command below, edited to include or exclude any Karma & Jasmine packages you have installed:
$ npm uninstall karma karma-chrome-launcher karma-coverage karma-jasmine karma-jasmine-html-report
Now that your project is ready and the existing test framework is cleaned up, it's time to add the Jest testing framework and explore the process of creating unit tests and the various features that Jest provides.
Setting Up Your Jest Environment
To use Jest instead of Karma, locate the test object within the architect object in the angular.json file in the root folder of our project. Then replace this object with the following:
…
"test": {
"builder": "@angular-devkit/build-angular:jest",
"options": {
"tsConfig": "tsconfig.spec.json",
"polyfills": ["zone.js", "zone.js/testing"]
}
}
…
Angular.json
Then, install the jest and jest-environment-jsdom libraries to allow the test to execute:
$ npm install jest jest-environment-jsdom --save-dev
With these modifications, the Jest engine is ready to run your tests. If your project previously had tests that passed using the Karma library, they should now execute successfully using the Jest framework. Whether you have unit tests or not, the next step is constructing a Jest test for your project.
The Component That We Want to Test
One of the new components that you added via the tutorial is the product details component. This component accepts a product from the main product wall and displays the product details as well as a “Buy” button that adds it to the user's cart.

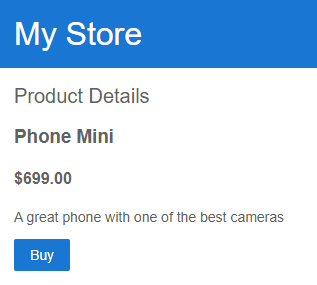
Consider what you might want to test on this page. From a structural perspective, you want to ensure that the application creates the component and that you find a valid product record. Validate that:
The product name is displayed
The product price is displayed and formatted correctly
The product description is displayed
Writing a Jest Test
The component accepts a route parameter in its constructor and then uses that to find the product information and display it to the user. The following is a listing of the component's source code and the HTML rendering code:
import { Product, products } from '../products';
import { CartService } from '../cart.service';
@Component({
selector: 'app-product-details',
templateUrl: './product-details.component.html',
styleUrls: ['./product-details.component.css'],
})
export class ProductDetailsComponent implements OnInit {
product: Product | undefined;
constructor(
private route: ActivatedRoute,
private cartService: CartService
) { }
addToCart(product: Product) {
this.cartService.addToCart(product);
window.alert('Your product has been added to the cart!');
}
ngOnInit() {
// First get the product id from the current route.
const routeParams = this.route.snapshot.paramMap;
const productIdFromRoute = Number(routeParams.get('productId'));
// Find the product that correspond with the id provided in route.
this.product = products.find(product => product.id === productIdFromRoute);
}
}
src/app/product-detail/product-details.component.ts © Google LLC
<h2>Product Details</h2>
<div *ngIf="product">
<h3>{{ product.name }}</h3>
<h4>{{ product.price | currency }}</h4>
<p>{{ product.description }}</p>
<button type="button" (click)="addToCart(product)">Buy</button>
</div>
src/app/product-detail/product-details.component.html © Google LLC
The first step is to create a file named product-details.component.spec.ts. The spec.ts suffix indicates to the test executor that it should include this test in the test suite. We'll start by importing the component we want to test. This initial code creates an instance of the component and compiles it. Next, we'll check the component to ensure that it processes the request correctly and then validates the user interface.
import { ComponentFixture, TestBed } from '@angular/core/testing';
import { jest } from '@jest/globals';
import { ProductDetailsComponent } from './product-details.component';
describe('ProductDetailsComponent', () => {
let component: ProductDetailsComponent;
let fixture: ComponentFixture<ProductDetailsComponent>;
beforeEach(() => {
TestBed.configureTestingModule({
declarations: [ProductDetailsComponent],
}).compileComponents();
});
beforeEach(() => {
fixture = TestBed.createComponent(ProductDetailsComponent);
component = fixture.componentInstance;
fixture.detectChanges();
});
});
src/app/product-detail/product-details.component.spec.ts
This code is the basic setup for any component. You created the component using TestBed and loaded it up. But this component accepts an ActivatedRoute and CartService, so you need to either inject or create mocks for these objects to allow us to test the component successfully. Start with the ActivatedRoute.
You can access the ActivatedRoute object (route) from within the ngOnInit function, so you need to inject this as part of our unit test. Injecting specific objects is also a unit testing best practice – you should confine the scope of your unit test to the component or function you are testing. You can accomplish this by importing the HttpClientModule, ActivatedRoute, and convertToParamMap. Then, add a provider below the declarations statement of the first beforeEach function.
import { HttpClientModule } from '@angular/common/http';
import { ActivatedRoute, convertToParamMap } from '@angular/router';
beforeEach(() => {
TestBed.configureTestingModule({
declarations: [ProductDetailsComponent],
imports: [HttpClientModule],
providers: [
{
provide: ActivatedRoute,
useValue: {
snapshot: {
paramMap: convertToParamMap({
productId: '2'
})
}
},
},
],
}).compileComponents();
});
This initial setup is technically correct; however, test files require at least one test for the TestRunner to execute them successfully. Start by validating the initial processing handled by the ngOnInit function.
How to Write Jest Tests
Add the tests at the bottom of the file before the final });
1. Validate the creation of the component
This test is simple – check the component to ensure it is truthy. Truthy implies that it exists, and it's used in cases where the object type is unknown. If it doesn't exist, this test will fail.
it('should instantiate the Product Details Component', () => {
expect(component).toBeTruthy();
});
2. Validate that the product record loaded
This test validates that the component successfully located and loaded a product record within the component.
it('find a valid product', () => {
expect(component.product).toBeDefined
});
Now, access the rendered HTML to validate the accuracy of the product data that’s returned. These tests help validate the data display and ensure that the UI displays the correct data.
3. Validate the product title
Isolate the HTML element and then use the querySelector function to find the target component. Ideally, you should use a more specific identifier, but the tutorial displays each data element within a unique HTML tag.
it('should render the title correctly for this product', () => {
const element = fixture.nativeElement;
const productTitle = element.querySelector('h3');
expect(productTitle.innerHTML).toEqual('Phone Mini');
})
4. Validate the product price
Some of the code duplicates that of the previous test. It's possible to call the nativeElement once and then check all three values within the same test, but it's a good testing practice to test a single element in each test. One benefit of doing so is that if a test function with multiple tests fails, it takes more time to isolate which of the tests caused the failure.
it('should render the price correctly for this product', () => {
const element = fixture.nativeElement;
const productPrice = element.querySelector('h4');
expect(productPrice.innerHTML).toEqual('$699.00');
})
5. Validate the product description
it('should render the description correctly for this product', () => {
const element = fixture.nativeElement;
const productDescription = element.querySelector('p');
expect(productDescription.innerHTML).toEqual('A great phone with one of the best cameras');
})
You're now ready to execute your test suite and validate the functionality of your component. For a small application like this, it's easy to check the UI and run a couple of manual tests to validate the data; however, as your application grows, comprehensive unit tests ensure that you don't miss bugs that were inadvertently introduced before deploying your application.
Executing Your Jest Test Suite
As mentioned above, support for Jest in Angular 16 is experimental; however, Angular engineers are working diligently to add more support for Jest in future releases. That said, with the changes we made up top, you can quickly execute your tests using the Angular CLI and the ng test command.
$ ng test
NOTE: The Jest builder is currently EXPERIMENTAL and not ready for production use.
The esbuild-based browser application builder ('browser-esbuild') is currently in developer preview and is not yet recommended for production use. For additional information, please see https://angular.io/guide/esbuild
- Building...
Application bundle generation complete. [3.677 seconds]
(node:7916) ExperimentalWarning: VM Modules is an experimental feature. This feature could change at any time
(Use `node --trace-warnings ...` to show where the warning was created)
PASS dist/test-out/shipping.component.spec.mjs
(node:24288) ExperimentalWarning: VM Modules is an experimental feature. This feature could change at any time
(Use `node --trace-warnings ...` to show where the warning was created)
PASS dist/test-out/product-details.component.spec.mjs
Test Suites: 2 passed, 2 total
Tests: 6 passed, 6 total
Snapshots: 0 total
Time: 2.314 s
Ran all test suites.
Using Jest to Ensure Code Quality
As a testing framework, Jest stands out due to its simplicity and the minimal configuration it requires. By ensuring that your projects have comprehensive unit tests, you can be confident that your team can add new features, fix bugs, and reduce technical debt without breaking existing functionality. Reducing the effort and configuration needed to do this is paramount.
Jest requires zero configuration for most Javascript projects and allows your engineers to write tests as they develop new features without much overhead. Its performant nature, parallelization when executing tests, and ability to isolate and limit the number of tests executed make it a critical tool for Test-Driven Development (TDD). A vibrant and active community ensures that a wealth of documentation and online examples are available for your team to review.
Unfortunately, at the time of writing, Angular has not yet fully implemented all the features of Jest into its platform natively. When fully integrated, you’ll be able to review your application's code coverage of unit tests. You can automate your testing strategy to ensure you maintain appropriate levels of testing throughout the development lifecycle.
Keep an eye on the Angular website for upcoming announcements about completing the Jest implementation. You can also check out the Jest website to review the Jest API, Getting Started material, and their active community.