IntelliJ is a popular, widely used Java Integrated Development Environment (IDE) made by JetBrains. It’s available for OS X and Windows. In this article, we’ll show you how to install it on Windows, add all the Selenium dependencies, and make a simple Java project that drives a test browser.
For an overview of how Selenium WebDriver works, see the blog post Getting Started with Webdriver/Selenium for Java in Eclipse.
What You Need to Run WebDriver Tests in Java Using IntelliJ
To create and run WebDriver tests in Java using IntelliJ you’ll need the following components:
Java
IntelliJ
WebDriver’s Java bindings
A Dependency Manager - examples will be in Maven
Google’s Browser Driving Engine - Chromedriver.exe
Java
Naturally WebDriver’s Java bindings require a version of Java to be on the system you’re running your tests from. WebDriver’s Java bindings require only the Java Runtime Environment (JRE), but you’ll be fine if you have either the Java Development Kit (JDK) or JRE installed.
There are also different versions for Enterprise, SE, and other Java JRE/JDKs. You can get Java from its download site.
We’ll skip walking through Java installation in this article since it will vary based on the version you select. If you need advice, as of this writing, use Java 8 Windows x84.
IntelliJ
IntelliJ IDEA comes in two releases: Ultimate, a commercial product that supports a wide range of development scenarios, and Community, a free version for Java Virtual Machine and Android development. Both releases are available on the Mac, Linux, and Windows platforms. All variants are available for download from IntelliJ’s homepage.
This article will use the Community variant on Windows 10.
Installing IntelliJ is a matter of following instructions for the version you’ve downloaded. Starting IntelliJ the first time will prompt you for various defaults (locations, keyboard mappings, etc.). This article uses all default settings.
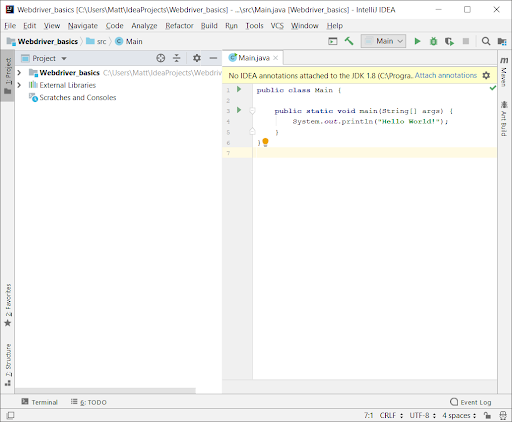
Creating The Project
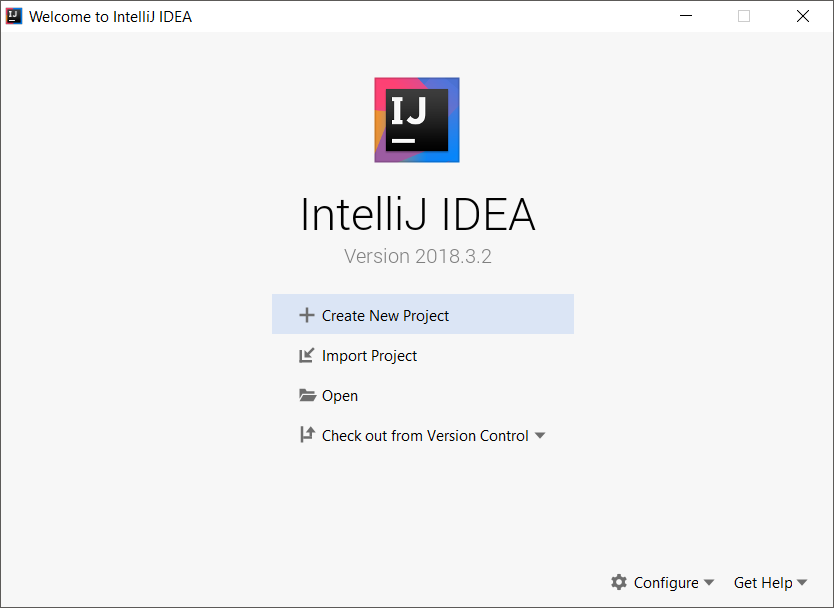
At startup IntelliJ will prompt you for basic actions—you can choose Create New Project right from the opening screen.

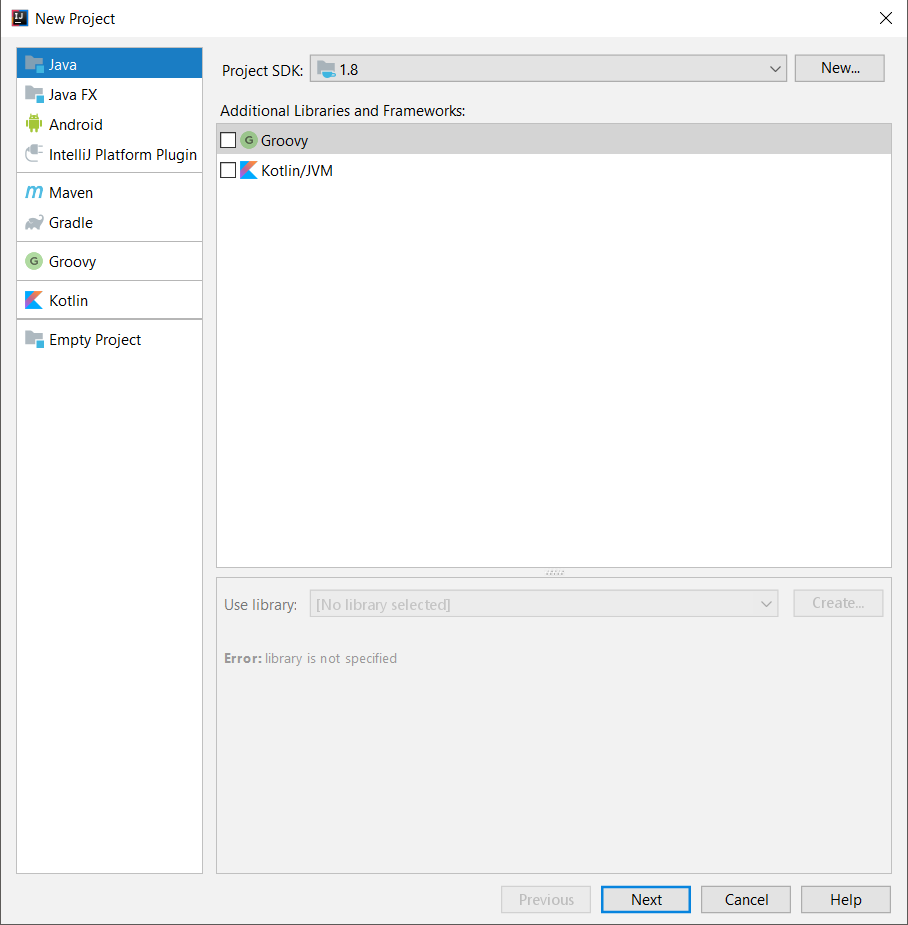
For this example choose the simple Java project with none of the additional library options selected and click Next.

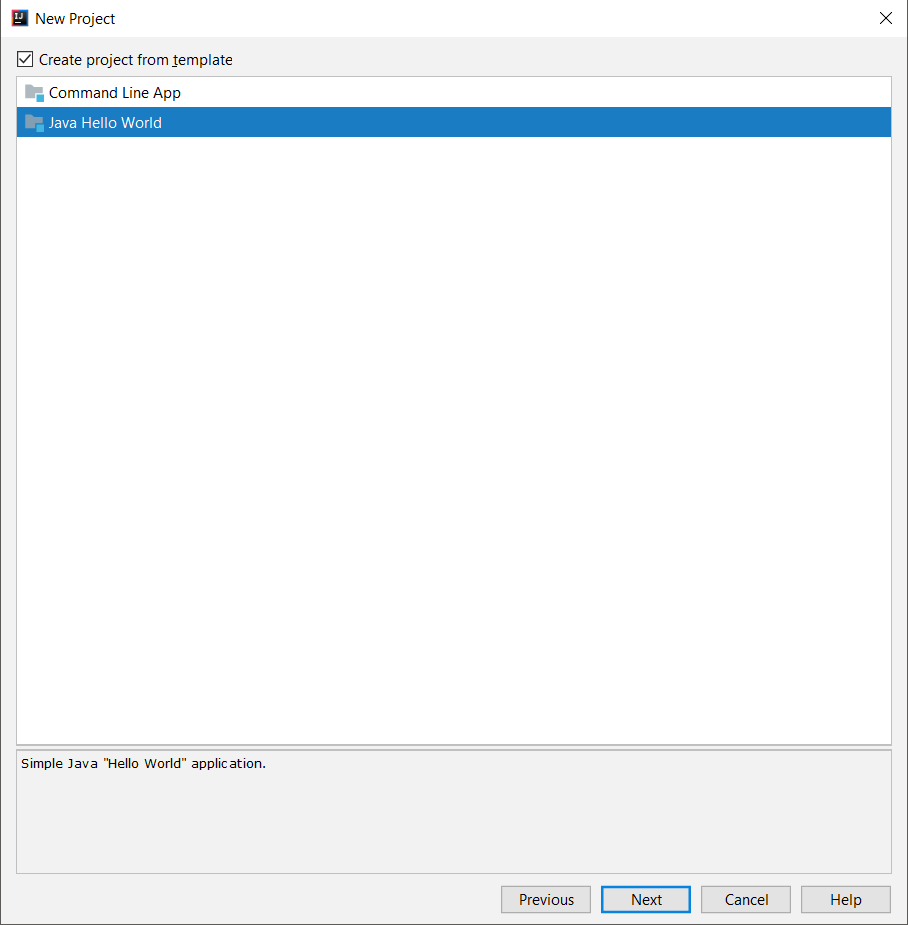
In the next, screen leave the Create project from template checkbox cleared and click Next.
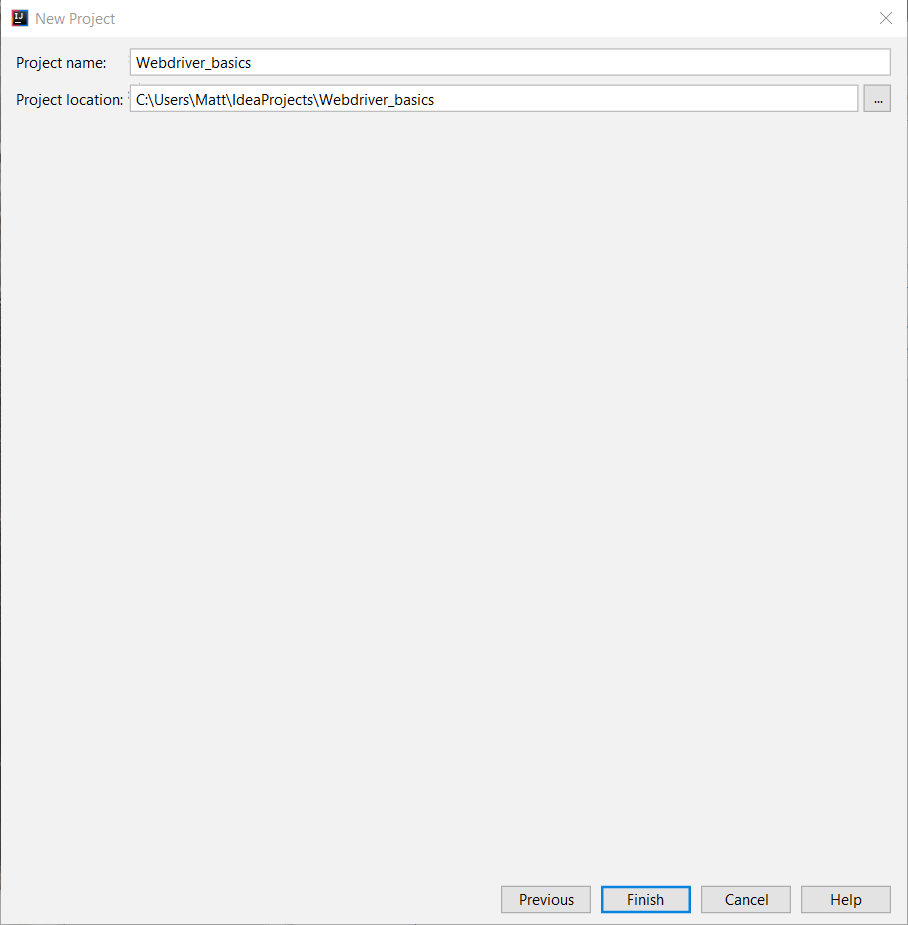
Give the project a good name and select a directory to store your project.
At this point you’re at the IntelliJ project’s home.

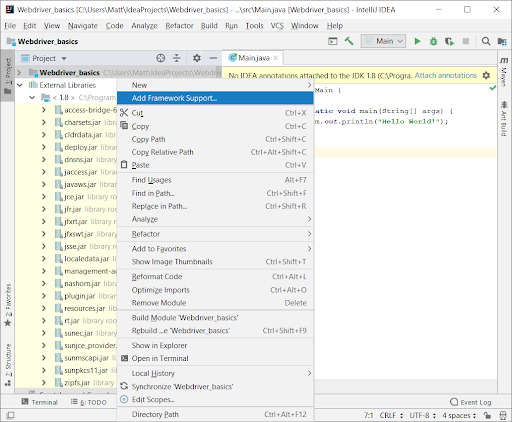
Adding Maven to IntelliJ
If you want to use Maven as your dependency manager (and if you don’t know, then use Maven), you’ll need to add it. To do so right click on the project name in the top-left and click “Add Framework Support”, as in the example below.
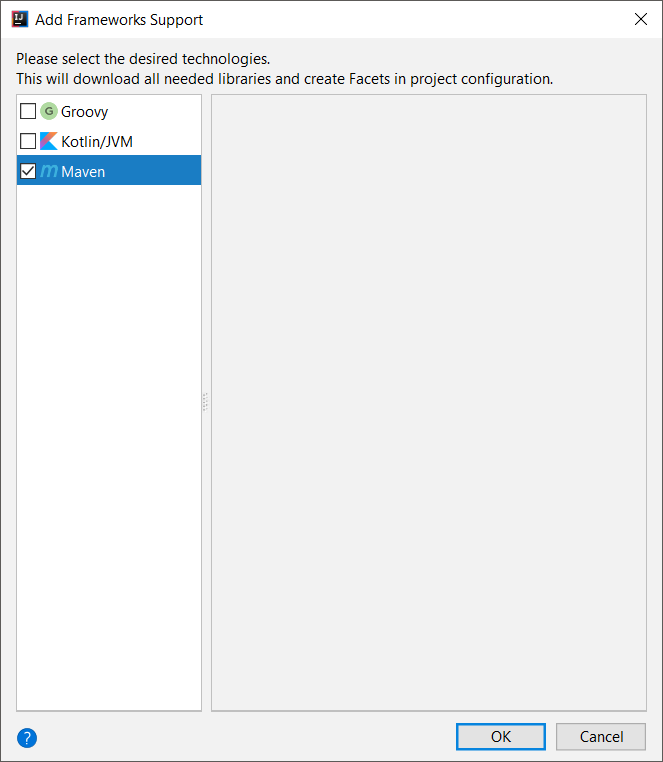
Select Maven and click Ok.

The software should bring you to the Maven import XML screen. Click in the bottom-left to add the XML file to your project.
We’ll add some XML code to the file, after </version> and before </dependencies>. Here’s the code to add:
1<dependencies>2<dependency>3<groupId>org.junit.jupiter</groupId>4<artifactId>junit-jupiter-api</artifactId>5<version>5.1.0</version>6<scope>test</scope>7</dependency>8<dependency>9<groupId>org.seleniumhq.selenium</groupId>10<artifactId>selenium-java</artifactId>11<version>3.141.59</version>12</dependency>13</dependencies>
This code adds a new structure, called “dependencies”, and then two dependencies - Junit 5.1 (“Jupiter”) and selenium-java. Both of these are registered with Maven. adding them to the POM, the project becomes aware of them and can use the code libraries as they were part of the project.
Browse Drive Engine
Finally, we’ll need to set up the browser driver engine. In the case of Chrome, this is a Windows executable file called ChromeDriver.exe. The Java code will call this program, and the program will manipulate the browser through it’s automation engine. Firefox, Safari, and InternetExplorer/Edge all have a similar executable file. You’ll save the file in a particular directory, then tell the Java code how to find the driver. In this case, download ChromeDriver. I‘ve downloaded the zipfile, expanded it, and put it in my “home” directory which is C:\users\matt. You’ll see that in the sample code below.
You’re done!
Load Libraries Into IntelliJ
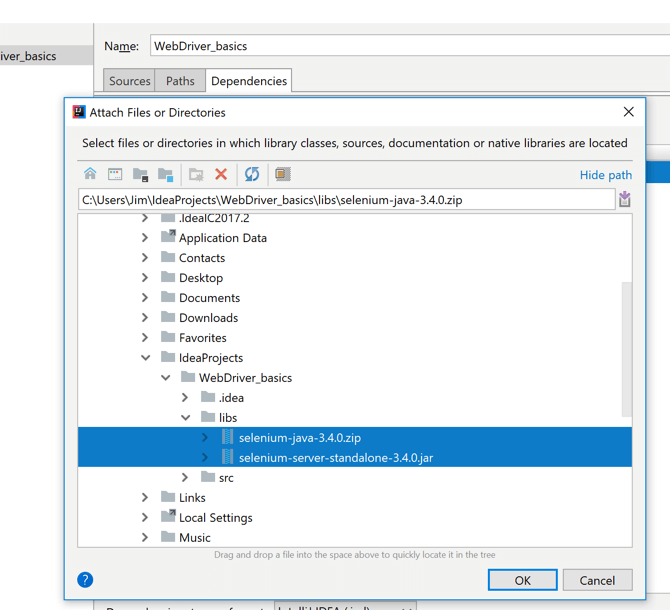
Download the Java WebDriver bindings and the standalone server (selenium-server-standalone-3.4.0.jar and selenium-java-3.4.0.zip, e.g.) and save them to a handy spot. I generally include a “libs” folder in my projects for external libraries like this.
Depending on your architecture you may need to unzip the zip file.
Use File => Project Structure to get the Project Structure dialog open, then select the Modules menu on the left. Click the Dependencies tab on the right, then use the “+” icon and add in the directory you saved the Selenium files to—”libs” in this example.

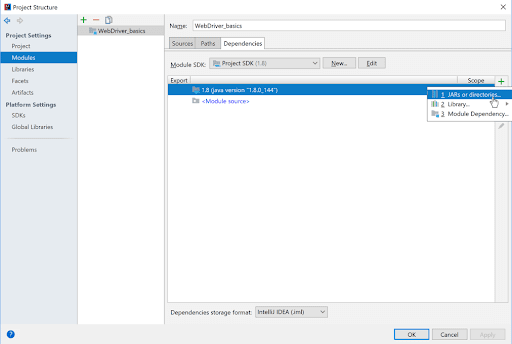
Here’s what the dialog looks like when you’re done.

You’re done!
Adding The Firefox Driver Proxy
As noted in the WebDriver Overview in the first post of this series, you’ll need to have a proxy for your test to talk to the actual browser. This example uses Firefox, so you’ll need to grab the appropriate proxy. Proxies for all WebDriver-supported browsers are listed on the SeleniumHQ’s list of Third Party Drivers. Firefox’s driver is part of Mozilla’s Gecko Driver releases. Make sure to grab the driver that’s appropriate for the version of Windows you’re running (x32, x64).
Download the zip file and extract the driver to a location on your system. You’ll need to add that location to your system’s PATH environment variable.
Important Note: You will likely need to restart your editor in order for changes to the PATH environment to take effect.
Writing Your First Test
WebDriver doesn’t know how to do anything other than talk to the browser driver. As a result, you’ll need some sort of test framework to execute your tests, make assertions, and report test status. We’ll use JUnit because 0) it’s very popular, 1) it’s simple to use, and 2) it’s included in IntelliJ by default! There are many other test frameworks for the Java platform.
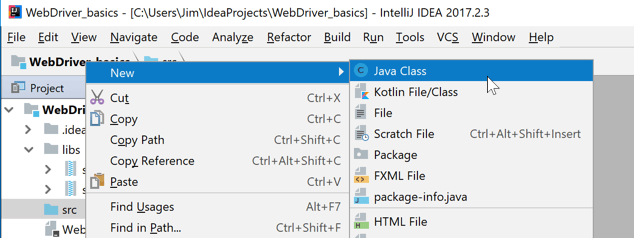
Add a new Java file by right-clicking the project, then selecting New => Java Class.

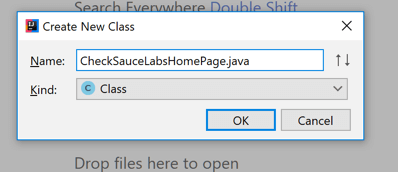
Give the class file a good, clear name and click OK.

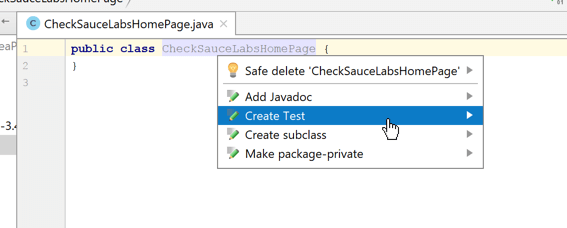
Now it’s time to transform that simple class file in to a JUnit test class. As with all IDEs, IntelliJ gives you multiple ways to do the same action. You can use menu actions, or IntelliJ’s “intention action” to both import JUnit libraries to the project and reference them correctly in the class file. Place the cursor on the class name, then use opt-Enter to call up the “intention action” menu. Select the Create Test option.

You’ll likely see a warning stating “No Test Root found.” This relates to the completely flat project structure we’re using for this extremely simple demo. For production work ensure you’re following your team’s proper structure! Dismiss this warning and carry on.
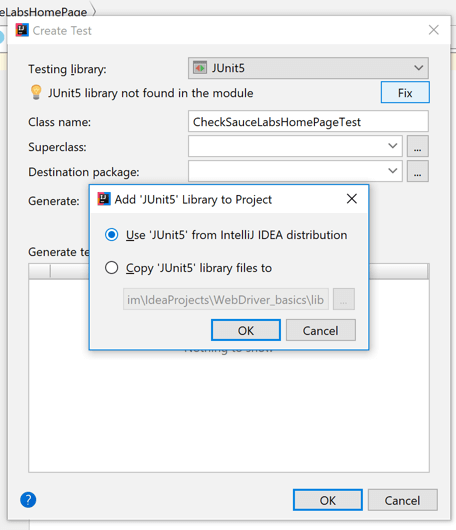
Next you’ll see the Create Test dialog. Select JUnit 5 in the Testing Library drop down. Note there’s a warning that no test library can be found. Use the Fix button to resolve the issue by calling up a sub-dialog. Select the button to use the JUnit library that comes with IntelliJ and click OK twice to close the dialogs.

A Simple Test
Below is a complete test case that starts a browser locally, executes a very simple test, then closes out the browser instance. The example is extremely simple and doesn’t follow normal practices like using Page Object Patterns. This is example code, not production code!
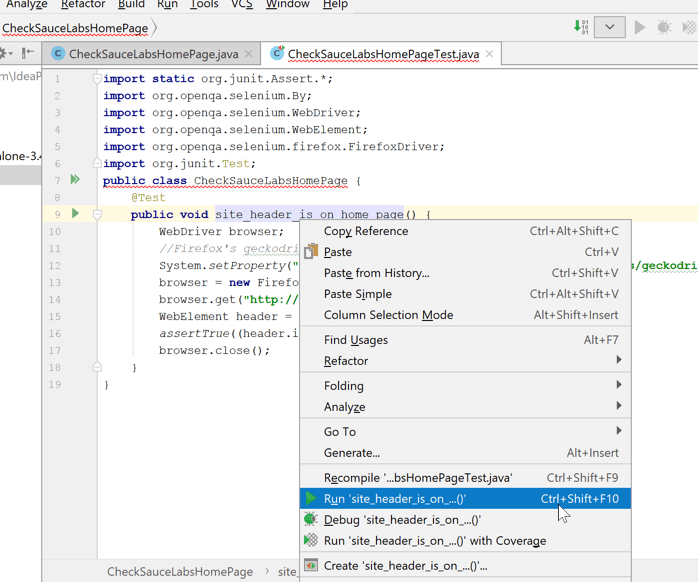
1import static org.junit.Assert.*;2import org.openqa.selenium.By;3import org.openqa.selenium.WebDriver;4import org.openqa.selenium.WebElement;5import org.openqa.selenium.firefox.FirefoxDriver;6import org.junit.Test;7public class CheckSauceLabsHomePageTest {8@Test9public void site_header_is_on_home_page() {10WebDriver browser;11//Firefox's geckodriver *requires* you to specify its location.12System.setProperty("webdriver.gecko.driver", "c:\\utils\\geckodriver.exe");13browser = new FirefoxDriver();14browser.get("http://saucelabs.com");15WebElement header = browser.findElement(By.id("site-header"));16assertTrue((header.isDisplayed()));17browser.close();18}19}
Running The Test
Running the test is simple: Use the right-click context menu from the test method’s signature, or use Ctrl-Shift-R to run the test.

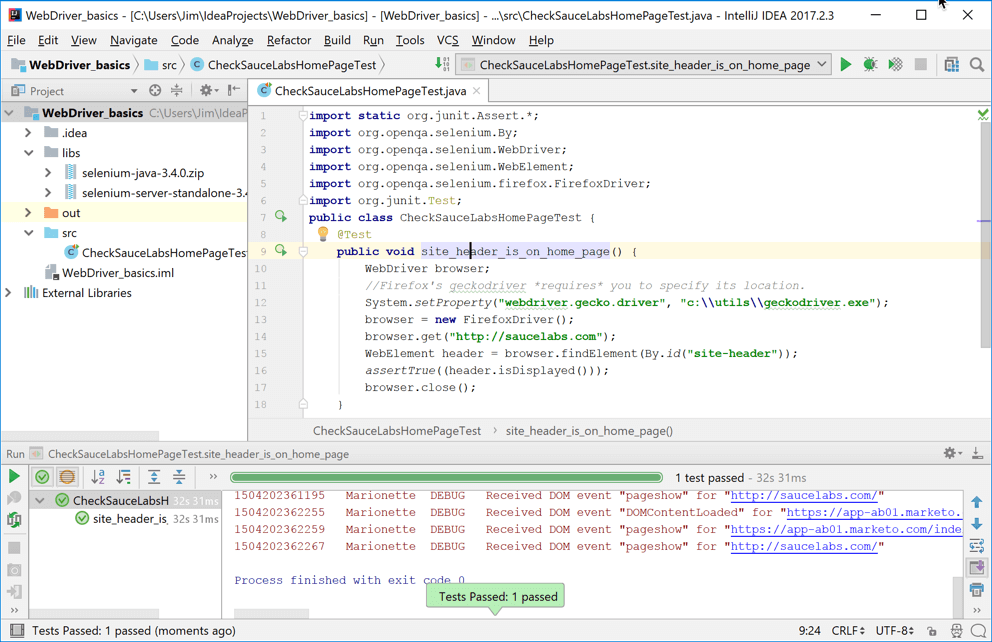
You’ll see the browser start, work through the test steps, and finally the green indicator in the Test Results pane.

Wrapping It Up
In this post you learned a bit about the different versions of IntelliJ, where to find the free Community version, how to create a basic project and add the various WebDriver pieces necessary for Java WebDriver tests, and we showed you an extremely simple test. All this was done on the Windows 10 platform.
Good luck with your explorations of WebDriver!